Printing worm gear
Action shot
Printer shot
The colour is awesome 
I have a 3d printer at home that I can throw some time for, I don’t have
fixed internet at the moment so it’ll keep me preoccupied while I wait for
the slow cogs of strata.
Build area is roughly 170ish square by about 190mm due to my hot end being
back to front
My material of choice atm is (strikethrough)plastic(/strikethrough) PLA, I
am still hunting down the ABS roll (I just moved house)
Cheeeers,
Max
That’d be awesome @mbainrot, I’ve just given you edit permissions on the google docs sheet for the rotator BOM: https://docs.google.com/spreadsheets/d/1Us8PCZAY7U2OZkkJcCpgPUc8FBVHKl9y_3qstFwGua4/edit?usp=sharing
The plan is we should add our names against each line item if we’ve printed them, to avoid duplicates.
Will also shortly setup the tripod BOM similarly too
Ok, the system we have now (I think!) is that we should add our names against each part as we start prints (in the shared BOM spreadsheet on google docs) so that others know it’s being taken care of and avoids duplicating effort:
There wont be many pink parts. The plastic has become very brittle over time. Trying to work with it has just gone wrong which has amplified the impact of the failure last night. But you at least get worm gears.
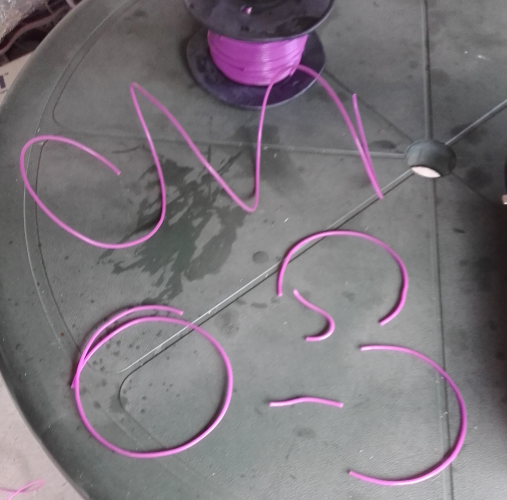
Unworkable
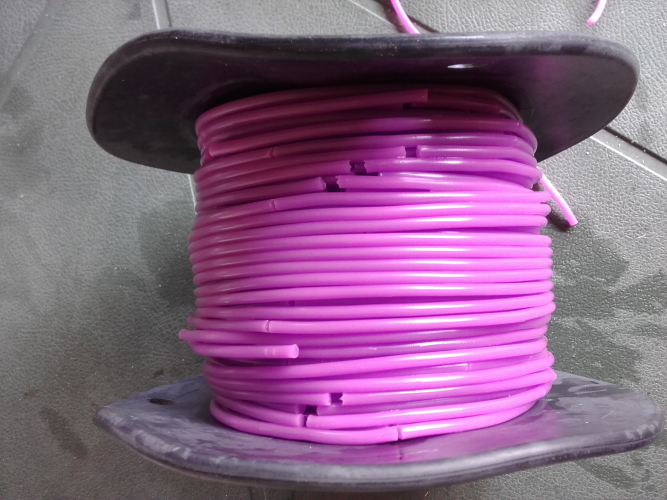
Not much that can done
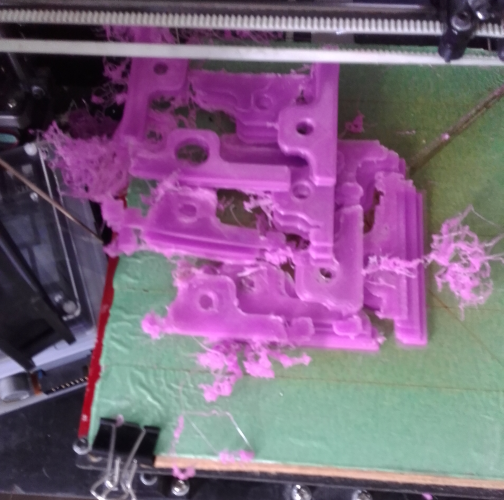
Well, poo
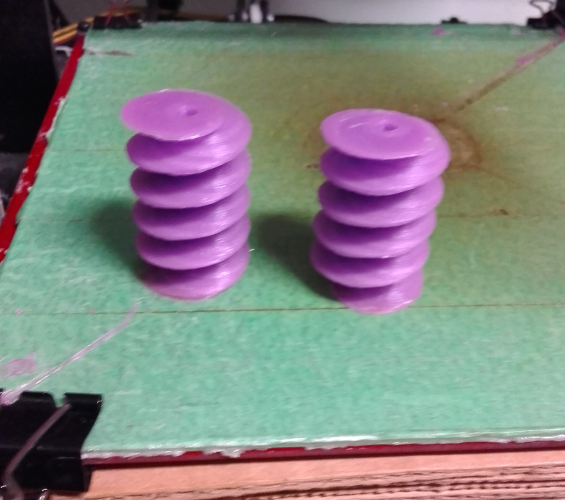
Some times it works
D’oh! Those worm gears look very clean though - I wonder if we can find some ABS somewhere? What diameter filament do you use?
Seems SatNOGS recommend ABS or PET-G generally but especially for rotator gears: https://community.satnogs.org/t/abs-vs-pla-for-printing-the-rotor-parts/498
And here are some discussions on worm gears specifically: https://community.satnogs.org/t/3d-printing-the-worm-gear/56
EDIT again: here’s a time-lapse of rotator v3 assembly https://www.youtube.com/watch?v=D6P9HK23Gmo
My my printer is 3mm, which makes things more difficult as it seams most printers these days 1.75mm diameter.
Atleast your print times should be a wee bit shorter
Though that should be easily fixed with a nozzle change and maybe a few tweaks to the hot end
To print one axis side, plus 2x M3 nut thingos plus two encoder holders, it’ll take me 5hrs and 40 minutes, provided no one beats me to it 
Though granted my print settings are very conservative to minimise the violent vibrations the default settings induce in my cheap computer desk desk. But the other plus of over conservative settings means multipart printing is alot safer
I’ve printed the homing rings, and by the time I go to bed the motor mount flanges will be done  though slic3r has spat out some really bloody noisy & violent gcode for those
  Might be the slightly more recless speed settings that I might have accidentally used
My filament isn’t a wicked purple, it’s only a boring Jaycar PLA Blue, but their blue PLA seems to be the most stable with behavour like ABS, though no where near as strong (it only breaks when work hardened, which is contrary to normal PLA whereby it should instantly snap) , their white PLA is the worst at moisture degradation, very very prone to breaking like @ian observed after some exposure to air and moisture, which sucks because the print results are quite nice with that filament
Though I am not immune from problems, my reel is tangled really badly so I have to constantly tend to it, not like I was going to leave the 3d printer unsupervised, but is a pain when your watching a movie and get interrupted by growling stepper motors
Definitely appreciate the epic print times and work involved from everyone so far, I’ll see if I can buy some ABS for people to use.
My progress has stalled for a few days.
I took a medium-ish tumble yesterday twisting my ankle and straining my neck. It wouldn’t be too much of a problem except that I left my printer at the space so I could run long prints without disturbing my house mates overnight. I planed to call in to the space before and after work each day to set off the next print, but extra running around and climbing stairs will have to wait until I’m recovered sorry.
There should be one worm_mount_mirror.stl sitting waiting at the space, though I don’ t know if it finished successfully. I have the worm gears at my house.
Ouch! That sounds painful. Thanks heaps for your efforts so far. Perhaps I’ll have a go at kicking off the next print on you rmachine over the weekend if it’s still at the space? There’s definitely no need to injure yourself further climbing up & down stairs at MHV 
Thanks for the update
Its a bit of a process but what 3d printer isn’t?!?!.
Hopefully the last print should pull off mostly cleanly. Push back down any tape that comes up.
Use the LCD screen knob to navigate. Push down to click, turn left and right to navigate the menus.
For the pink set the extruder temp to 165 under the Control->temperature menu I think.
I haven’t been using the heated bed at the moment.
Hopefully the height is still correct, if the machine has been turned off and on again this wont be the case, nor will it extrude anything.
To start the print
To adjust the height
Gently push the extruder module down to make sure it completely settled. Use the stepper motor connectors shown in figure 1 until the plastic looks like figure 2 (I think the parts on the printer are actually black not grey). If you can’t do this quickly enough before its done about 3 laps of the shape, stop the print remove the plastic from the bed and restart/repeat until you are happy with the height. Normally turn both sides at the same time, it will feel like its clicking as you are effectively making it ‘jump’ between steeps. If one side (left-right) of the print is at the right height but the other side isn’t then you can turn one at a time, you will probably need to hold the side you don’t want to move as they often will skip round together.
figure 1
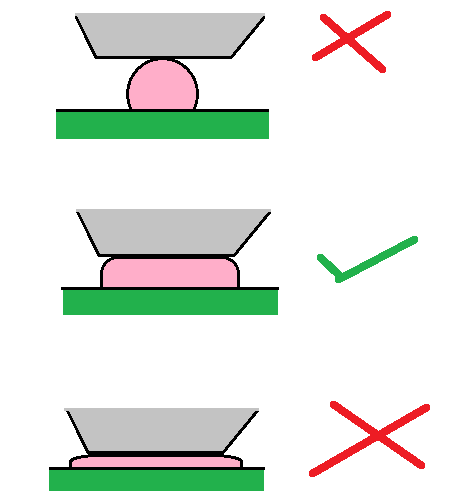
figure 2
Awesome docs! I’ll give it a go. What’s the worst that could happen? 
I’ve had a pretty long night last night, lots of walking at work last night
so I prob won’t make it into the space today.
We get about an hours break for meal break so when I am working overtime on
Sunday I’ll drop into the space and drop off my produce 
@Ian I hope you feel better soon
Nice! Absolutely beautiful even 
All the pink bits that are being made are done, there is no more usable pink plastic.
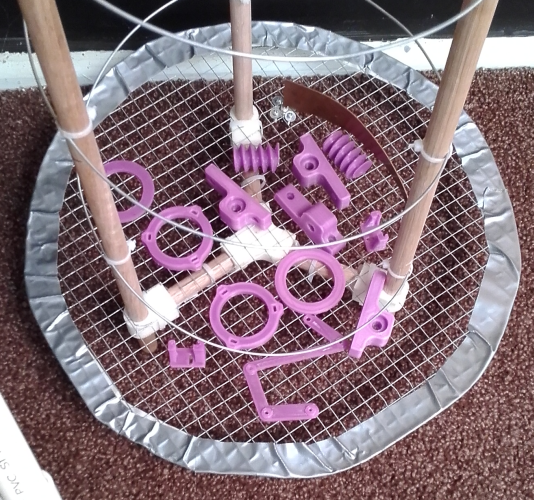
Pink bits.
Excellent!
I tried to print a contribution on Tuesday, but Solidoodle was unhappy 