I’ve mentioned to a few that I was building a pick and place machine, largely just for the fun of it. If I can make my life easier building prototypes with it, then all the better.
It’s based largely on this one: Project | DIY Pick and Place | Hackaday.io, which I believe was based on yet another project, and has largely become the defacto standard in diy OpenPnP builds.
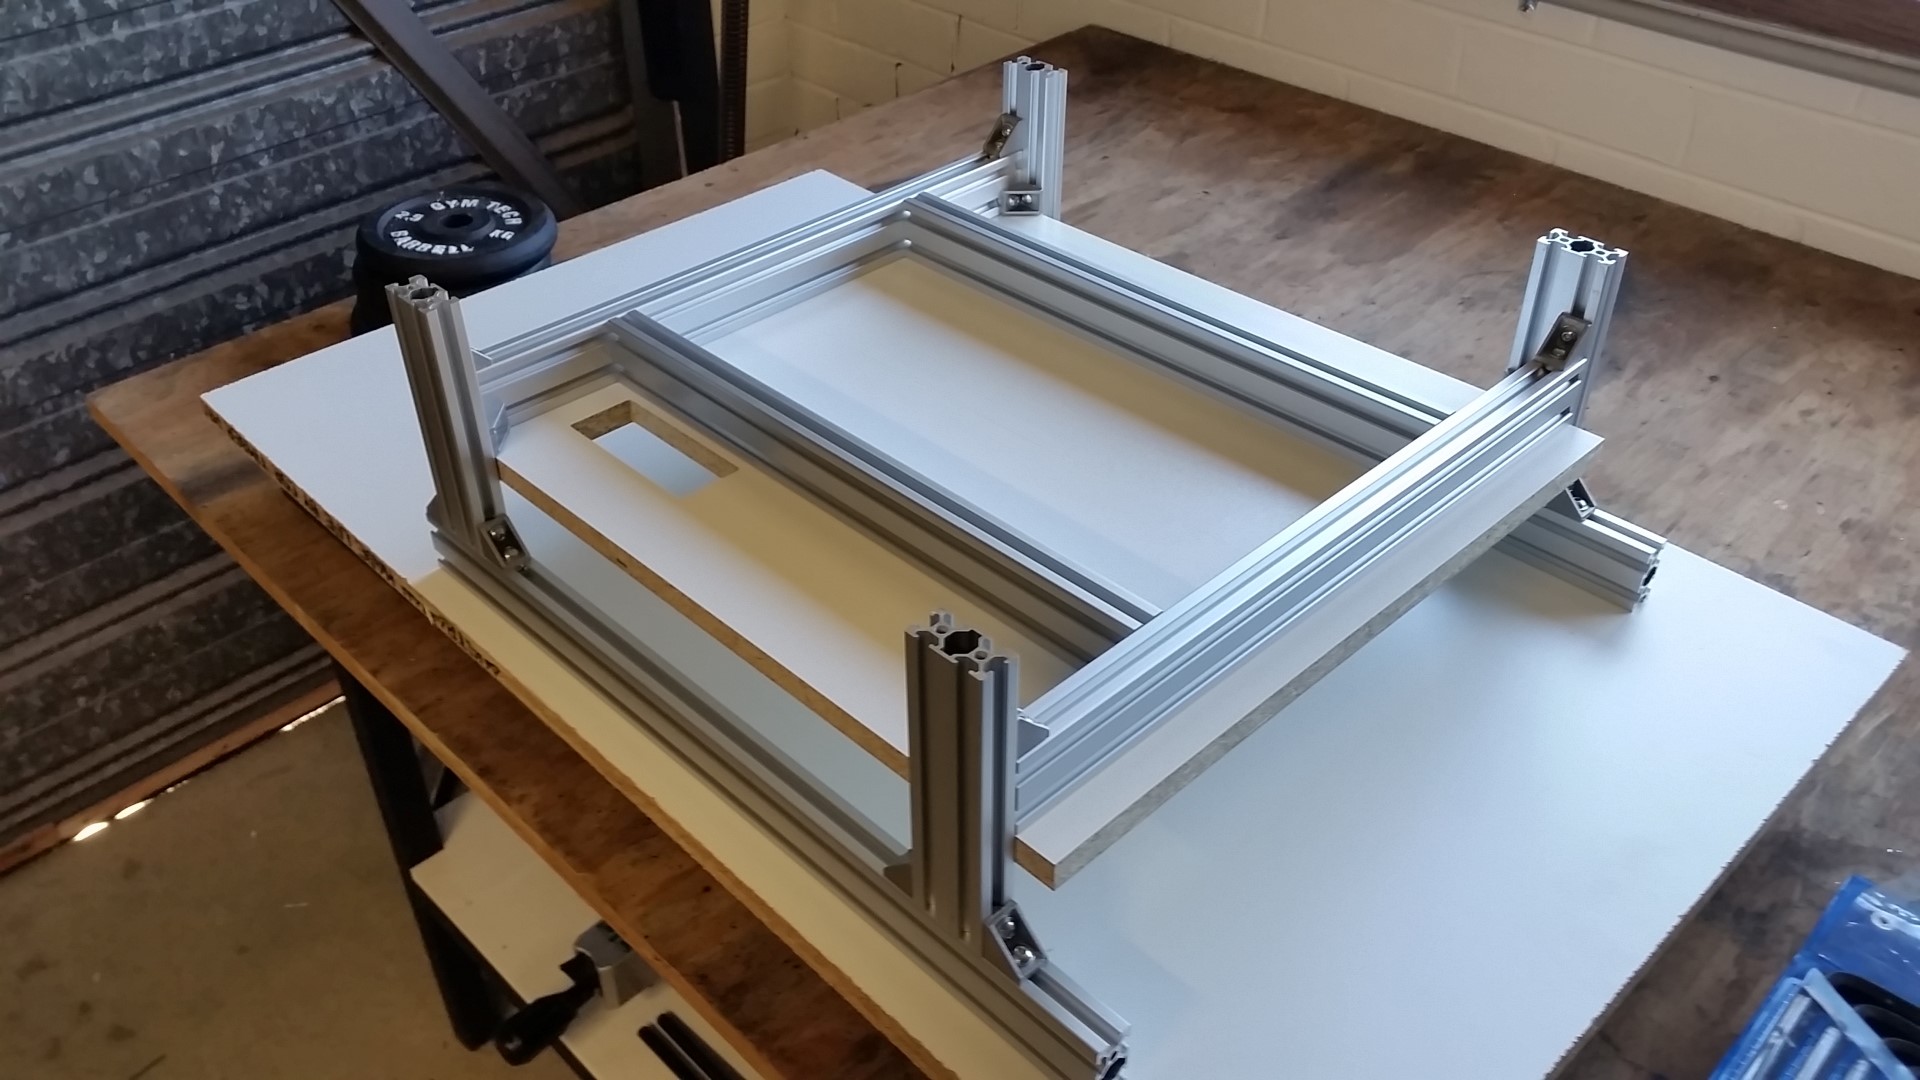
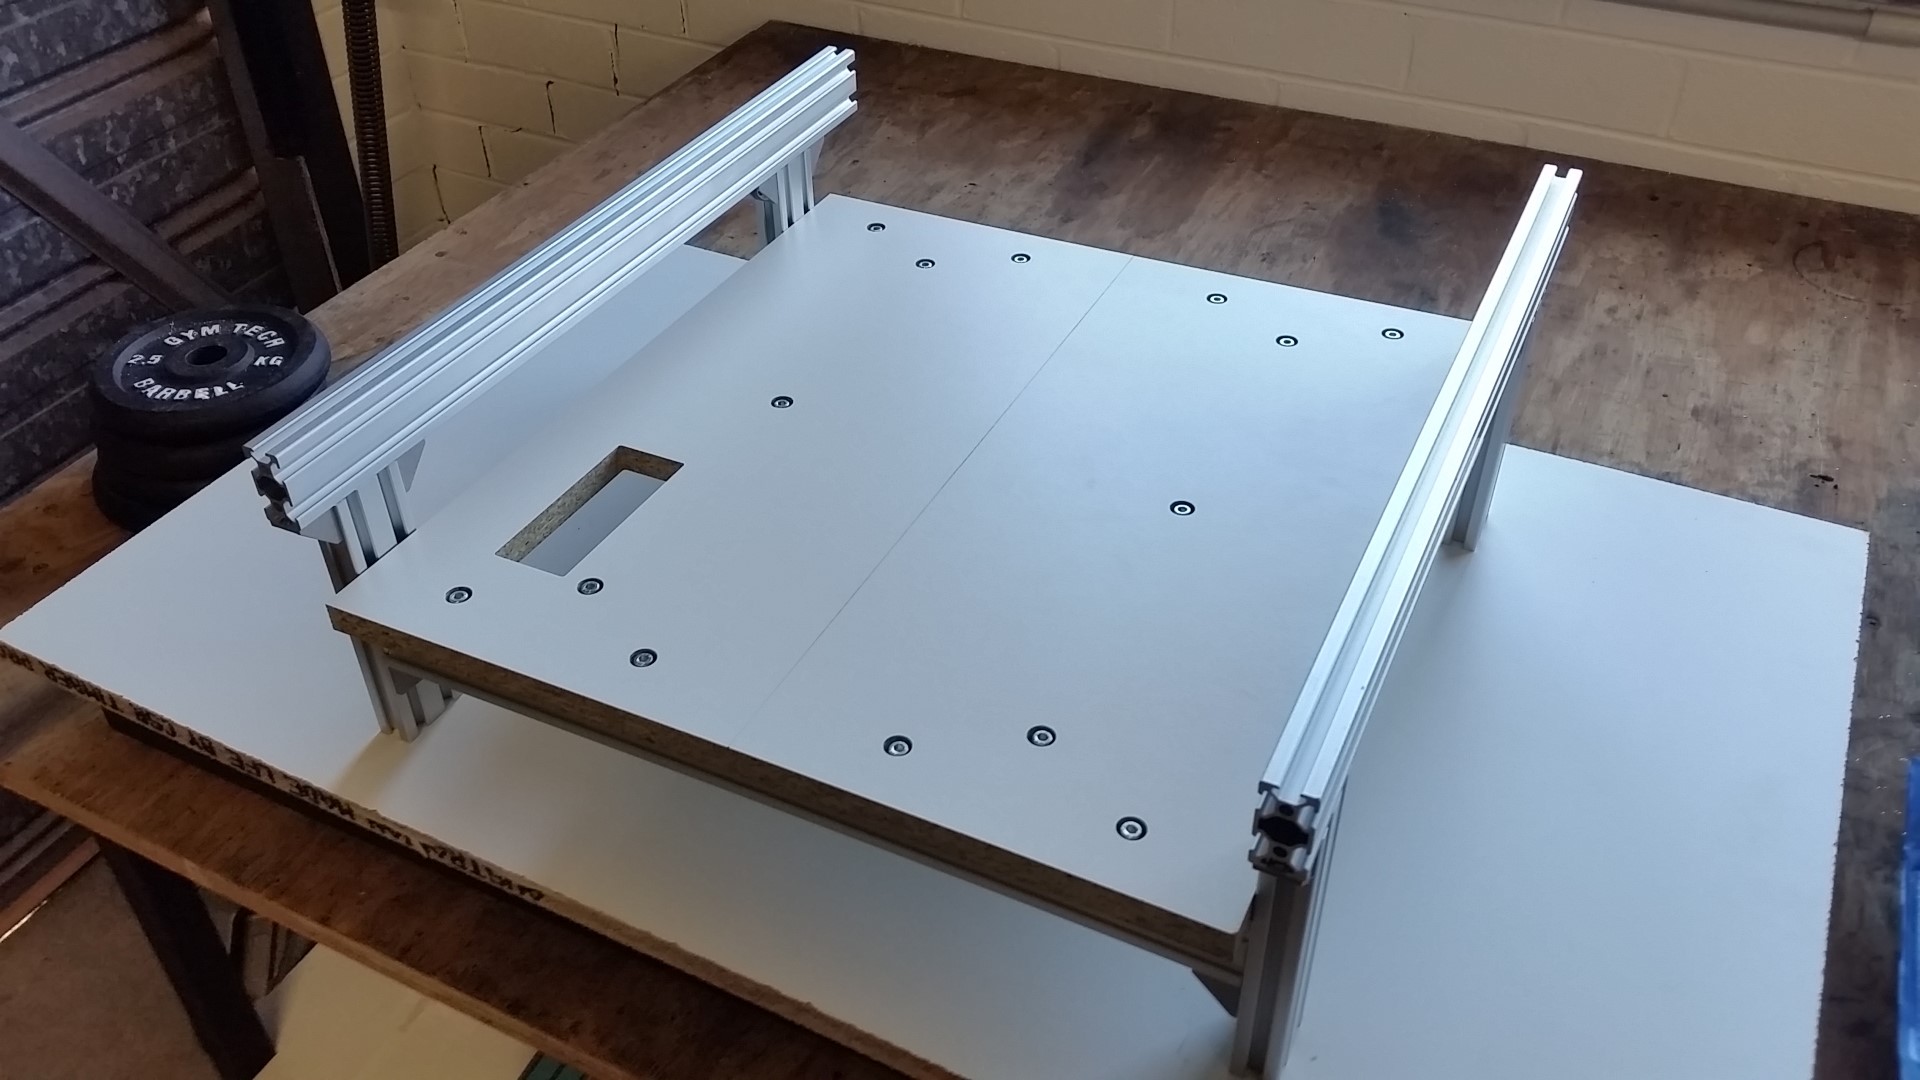
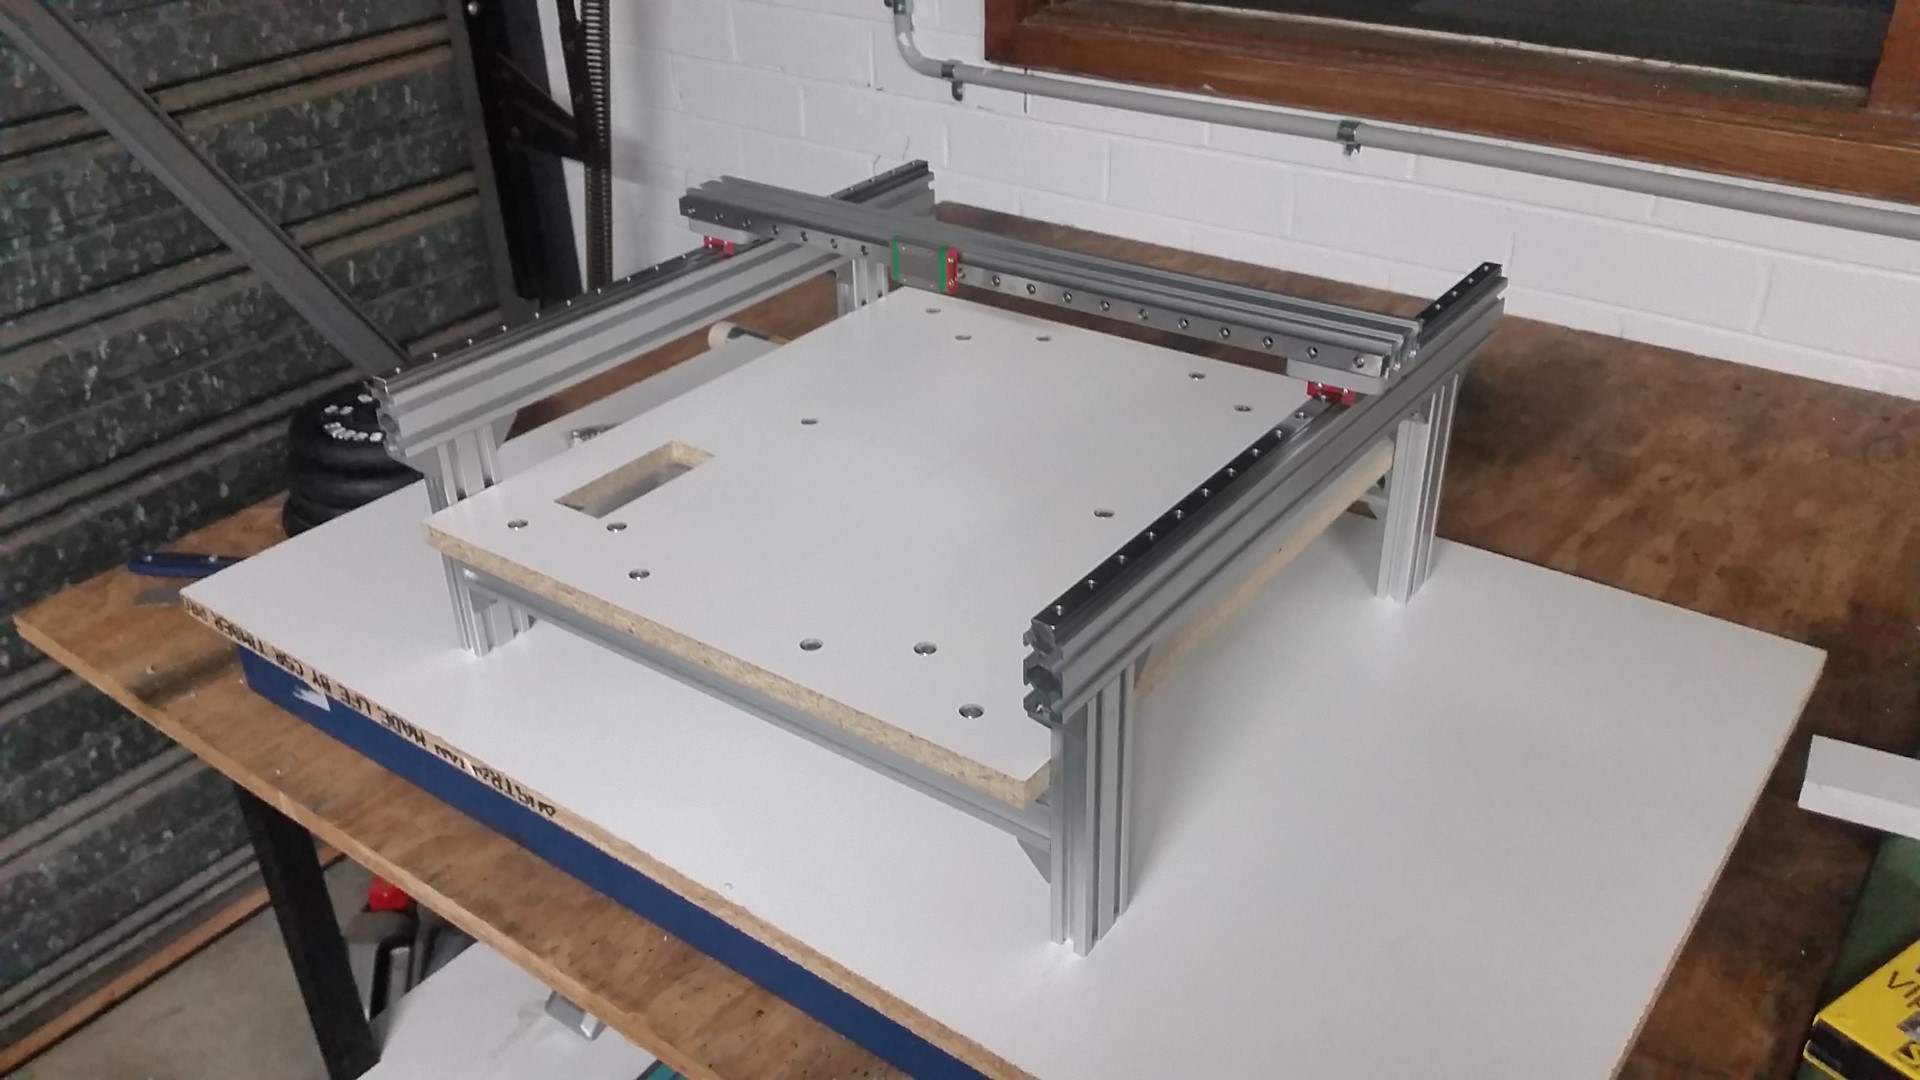
Anyway a few progress photos. I have almost everything now, so it’s a matter of designing and routing brackets etc.
Did you get cheap or quality linear rails and how smoothly does your gantry move?
If you want I can cut a galv sheet metal overlay for the base, so you can magnetically clamp stuff.
It would be guillotined - so nice cut edges. Cost of $20 including cutting all goes to mens shed.
That rectangular hole might be best marked in place, then either you cut, or I can do if you really want, but it will be a slightly rouger finish than the guillotine.
What are you planing for feeders?
I have a contact scrounging occasional recycled items & he scored a 9mm thick pancake stepper, mitsumi M35SP-11NK from a Stylus Nx420. It is really powerfull for its size, but now I just need another 20 or 30…
Thanks for the galv offer, do you know how thick it is by chance? I’ve seen some galv sheet that would be a bit too thin, and can could easily end up “non-flat” for want of a better term
Cutting out the camera hole will be easy enough, I’ve got a nibbler, so I’ll probably stick the sheet down then cut it in place using the routed hole as a guide. Won’t be perfectly, but should be good enough.
The rails are no-brand, but I think I got pretty lucky with these, they move very smooth. I’ve had many other sets of prismatic rails before, cheap and expensive, and I think it’s fair to say the problem with the cheap rails tends to be a lack of consistency and non-ideal cleanliness/lub. Some are less than perfect, but I think on the whole they’re generally pretty good. It does make me wonder if the terrible youtube videos about them out there are cherry picked, as I’ve never seen anything as bad as some of those.
Again this is purely personal opinion, but dropping $400 on the set of Hiwin rails for this system, while sticking with t-slot aluminium extrusion for the frame is a waste of money. I would think you’d end up with a better end result spending the extra few hundred on making a steel frame and having the mating bearing surfaces milled flat so the bearings are always running very flat.
As for feeders, I’m going to worry about that later
My plan is to just start with the Openpnp strip feeder and go from there. At this stage at least, if I’m doing more than ~10 boards I’ll probably use a PCBA service anyway. I’m really trying to optimise for producing in the region of 2 to 5 prototypes, which a good holder for a strip is probably all that’s needed. Maybe…
Was hoping you would not ask what thickness - I should know, but always forget this sorta detail.
The shed has two thicknesses, the thinner is reasonably good for this purpose, but the thicker (0.9mm?) is a LOT more solid/heavier. I did leave some smaller offcuts on LHS of welding room at the space a couple of months back when I donated that folder, but can’t remember the thickness. You are welcome stop by mens shed and look at sheet metal. Best if you arrange time with me - save some explaining. Will be there 9-12 Wed, Thurs 1-3, and prob Sat 9-12.
I am planning on trying mill some from solid nylon-like stuff, have bought dovetail and slot cutters and hand routed some bad attempts. Botched a spreadsheet for gcode (because lots apps do not understand undercuts), got bogged down in learning FreeCAD, got my mill working reasonably well (for a real cheap DIY), realised easy way to do undercuts is prob just lie to CAD tool that material is much longer than reality and so cutting will start/end in mid air…but other jobs/projects in the way.
Sorry I couldn’t get out today, ran out of time before having to get to the airport.
As for the strip feeders, I too have a dovetail slot cutter on its way and was planning on routing out of plastic. I’m sure something like this, when one of us has it worked out it will not take much to roll out a bunch of them. I would have thought some hand rolled gcode would have been pretty easy for it, probably easier than convincing a CAM program to put out the right sequence…
Where do you get your nylon from? Previously I picked up chunks when I dropped by Specialty Fasteners in Fyshwick, as they use to sell offcuts at a reasonable price. But since getting back it doesn’t look like they do anymore…
That’s OK. Just PM me anytime. If you can’t make shed opening, let me know better time, as I live close by & have access.
I have a fair bit of black 20(22?)mm and some 15mm white - all from a sign writers bin in Fyshwick - we have permission & score well from that bin. There is some a shed, lot more at mine & one others house, mostly suitable for 1/2, ocasionaly more strips wide, and often 300mm+ long.
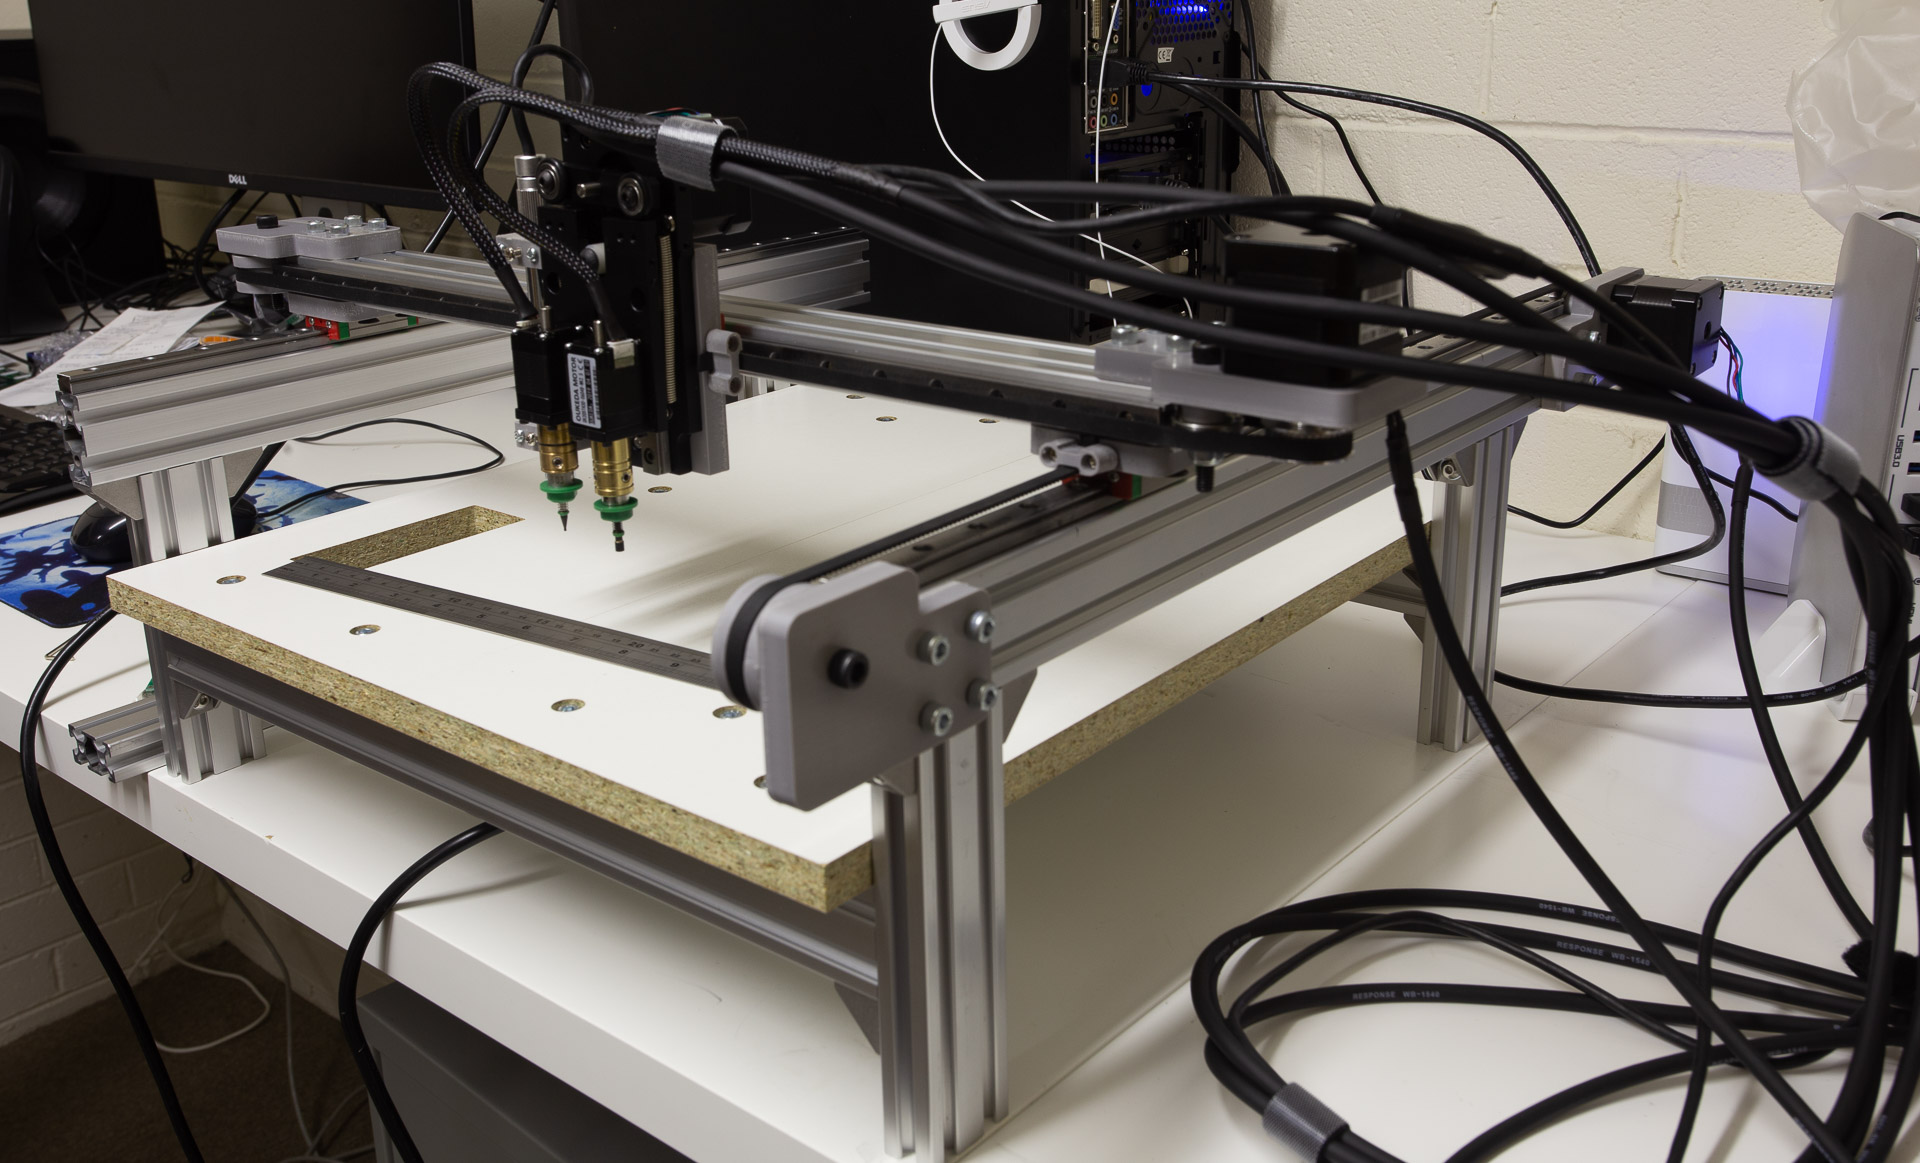
It’s now at the point where I can run without the bottom vision. A little demo of 0603’s in the youtube vid at the end.
I don’t think it’s too bad for no bottom vision, as the parts are never well aligned in the tape it’s picking from. Sorting out the bottom camera should get the alignment quite a bit better. Having said that, those parts would all have soldered up ok once surface tension pulled them into line.
It’s an interesting project, lots of somewhat unexpected twists. I built it with 40T GT2 pulleys, as the reference design I was loosely following used 52T, but I think the lack of resolution is holding the machine back quite a bit. 40T is 0.4mm per full step, so just to get to 0.1mm is 1/4 microstepping, which is dubiously accurate at best. In time I think it’s going to need smaller pulleys or moving to coarse pitch ball-screws.
Thanks for the offer, but I’m off working interstate now so this is left sitting on a bench for a while.
The OpenPNP software already has a very decent OpenCV chain that comes with it, which you can modify to suit. It’s pretty cool really and works well, obviously a lot of work has gone into it from the contributors.
Most of the innovation at the moment in this area is focused on producing a reliable feeder cheaply. There’s some interesting work being done using bulk bins, which could be super cool if they can get the speed up.